





Standing Yoga Poses for Beginners: 10 Easy Poses to Start With
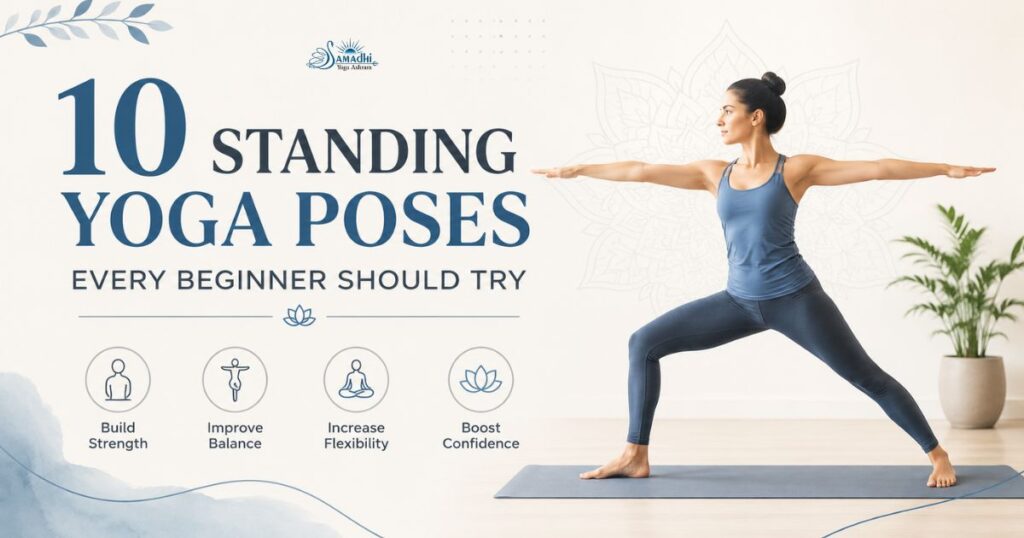
Table of Contents
- What Are Standing Yoga Poses?
- Are Standing Yoga Poses Good for Beginners?
- Why Practise Standing Yoga Asanas?
- A Few Things to Know Before You Start
- 10 Standing Yoga Poses for Beginners
- 1. Mountain Pose (Tadasana)
- 2. Upward Salute (Urdhva Hastasana)
- 3. Standing Side Bend (Ardha Kati Chakrasana)
- 4. Standing Half Backbend (Ardha Chakrasana)
- 5. Standing Forward Bend (Uttanasana)
- 6. Chair Pose (Utkatasana)
- 7. Tree Pose (Vrikshasana)
- 8. Warrior II (Virabhadrasana II)
- 9. Extended Triangle Pose (Utthita Trikonasana)
- 10. Extended Side Angle Pose (Utthita Parsvakonasana)
- Poses to Leave for Later
- A Simple 15-Minute Routine
- Which Standing Pose Helps Most With Balance?
- Can Standing Yoga Improve Your Posture?
- Final Thoughts
- Frequently Asked Questions
- Can I do standing yoga poses at home?
- Is it OK to do them every day?
- Should standing poses come before or after seated ones?
- Why do my legs shake?
- Do I need yoga blocks?
- Can older adults do standing yoga?
- When’s the best time to practise?
Standing yoga poses are exactly what they sound like. You do them on your feet.
They’re also one of the easiest ways to start yoga. You don’t need to be flexible. You don’t need much space and you can feel them working right away, mostly in your legs.
Below are 10 simple yoga standing poses for beginners. For each one, you’ll find easy steps, what it helps with, and a tip or two to make it feel better.
What Are Standing Yoga Poses?
Standing yoga poses, also called standing asanas, are poses where your feet hold you up. Some use both feet close together and some use a wide position. A few ask you to stand on one leg.
Most yoga classes start with them. They warm you up and get your legs working. After that, seated stretches and slower poses feel much easier.
Are Standing Yoga Poses Good for Beginners?
Yes, they’re a great place to start.
When you’re standing, you can see what your body is doing. Is your knee pointing the right way? Are you leaning into one foot? You can check and fix it on the spot.
That’s a big part of learning yoga. You slowly get to know your own body. Standing poses teach this in a very clear, simple way.
Why Practise Standing Yoga Asanas?
Here’s what most people notice after a few weeks of regular practice:
- Your Legs Get Stronger: Your thighs, hips, and calves hold you up in every pose, so they get plenty of work.
- Your Balance Improves: Standing on one leg feels shaky at first but with practice, it gets steadier.
- You Stand a Little Taller: These poses make you notice how you hold yourself and many people start standing straighter without even trying.
- Tight Spots Loosen Up: Hips and the backs of the legs often get stiff from sitting, and standing with your feet wide apart and doing forward bends can help.
- Your Mind Settles: It’s hard to think about your to-do list while you’re balancing on one foot.
- You Can Do Them Almost Anywhere: A small space at home is enough.
To be clear, yoga isn’t a cure for health problems but as a regular habit, standing poses are a gentle and useful way to build strength and balance.
A Few Things to Know Before You Start
Read this once. It applies to every pose below:
- Breathe slowly through your nose. Breathe in as you lift or reach up, breathe out as you fold, bend, or sink down and don’t hold your breath.
- Go barefoot. Use a yoga mat to help you stay steady. Wearing socks on a smooth floor can make you slip.
- Keep a tiny bend in your knees. Keeping them straight puts stress on the joint.
- Hold each pose for 3 to 5 slow breaths. That’s roughly 15 to 30 seconds, later, you can stay for longer.
- Do both sides. If you did it on the right, do it on the left too.
- Pain means stop. A stretch can feel strong but it shouldn’t feel sharp.
- Use a wall or chair if you need one. Plenty of experienced students still do.
- Don’t practise right after a meal. Give it 2 to 3 hours.
If you’re pregnant, recovering from an injury, or have high blood pressure, heart trouble, or ongoing joint pain, check with your doctor first. A qualified yoga teacher can also help you adjust the poses.
10 Standing Yoga Poses for Beginners
The poses are in an order you can follow from start to finish. The first few are gentle and the later ones ask a bit more from your legs.
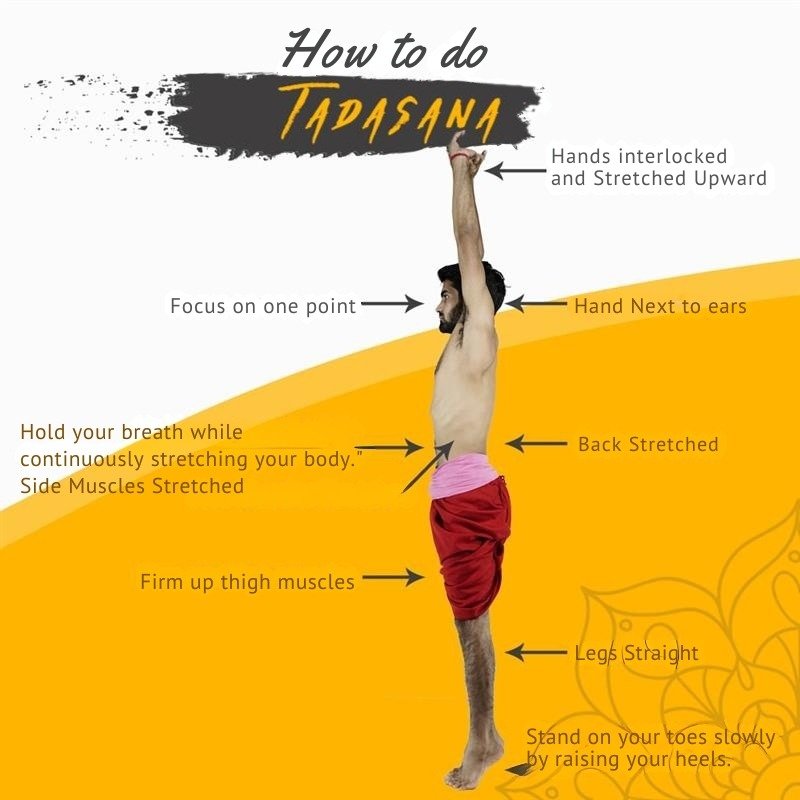
1. Mountain Pose (Tadasana)
This is basic standing position yoga pose, done with care. It looks simple, and it is. But it’s also the pose you’ll come back to between almost every other standing pose.
How to do it:
- Stand with your feet together or a little apart and toes point forward.
- Spread your toes and keep your feet firmly on the floor.
- Relax your knees.
- Let your spine grow long, as if the top of your head is being lifted gently.
- Drop your shoulders away from your ears.
- Rest your arms by your sides.
- Look ahead and take 5 to 8 easy breaths.
Benefits:
- Shows you what good, upright standing feels like
- Helps you notice where your weight sits on your feet
- Gives you a calm, steady start before you move
Beginner tip: Gently shift your weight toward your toes, then toward your heels. Move your weight slightly from one foot to the other and then find a position where your weight feels balanced on both feet.
Read more: Tadasana (Mountain Pose): Steps, Benefits & Key Things to Know
2. Upward Salute (Urdhva Hastasana)
Now lift your arms. That’s really all this pose is. It feels like a big morning stretch.
How to do it:
- Start in Mountain Pose.
- Breathe in and raise your arms out to the sides and up overhead.
- Keep your arms about shoulder-width apart, with your palms facing each other or join your palms if that feels comfortable.
- Keep your shoulders low and relaxed.
- Keep your spine long and your lower back relaxed.
- Stay for 3 to 5 breaths, then breathe out and lower your arms.
Benefits:
- Stretches your arms, shoulders, and the sides of your body
- Opens your chest, so breathing feels easier
- Helps you feel more awake and alert
Beginner tip: Tight shoulders? Take your arms wider. A small bend in the elbows is fine too.
3. Standing Side Bend (Ardha Kati Chakrasana)
You’ll see this one a lot in traditional Hatha Yoga classes in India. It’s a slow, easy bend to the side.
How to do it:
- Stand with your feet together or slightly apart.
- Breathe in and raise your right arm up next to your ear.
- Leave your left arm resting by your side.
- Breathe out and slowly bend to the left and your left hand slides down your leg.
- Keep your chest facing forward and try not to tip forward or back.
- Hold for 3 to 5 breaths.
- Breathe in to come up and lower the arm and switch sides.
Benefits:
- Gives the waist and ribs a good stretch
- Helps your spine move one side to the other, which it rarely does in daily life
- Can help loosen your body after sitting for a long time
Beginner tip: Reach up first, then bend to the side. This helps you get a better stretch.
4. Standing Half Backbend (Ardha Chakrasana)
The name means “Half Wheel Pose.” Don’t worry, you won’t be doing a full wheel. This is a small backbend with your hands supporting your lower back.
How to do it:
- Stand with your feet hip-width apart.
- Put your palms on your lower back, fingers pointing down.
- Breathe in and lift your chest.
- Breathe out and lean back just a little and let your hips move slightly forward.
- Keep your neck long and your head shouldn’t fall back.
- Hold for 2 to 3 breaths. Breathe in and come back up slowly.
Benefits:
- Opens the chest and fronts of the shoulders
- Balances out all the forward hunching we do over phones and laptops
Beginner tip: Think “lift the chest,” not “bend the back.” A little goes a long way here. Skip this pose if you have a back injury or it makes you dizzy.
5. Standing Forward Bend (Uttanasana)
Here you fold forward and let your upper body hang. It’s a stretch for the backs of your legs, and it can feel quite restful.
How to do it:
- Stand with your feet hip-width apart.
- Breathe out and fold forward from your hips.
- Keep your legs straight if comfortable and if you find this difficult, bend your knees slightly.
- Rest your hands on your lower legs, on blocks or on the floor.
- Let your head relax down and stay for 3 to 5 breaths.
- To come up, keep your knees bent, bring your hands to your hips, and rise slowly as you breathe in.
Benefits:
- Stretches the hamstrings and calves
- Lets tension drain out of your back and neck
- Many people find it calming
Beginner tip: Forget about touching your toes. Bent knees are perfectly fine. If you have high blood pressure or glaucoma, or you get dizzy with your head down, just fold halfway. Keep your back flat and hands on your thighs.
6. Chair Pose (Utkatasana)
Picture sitting down on a chair that isn’t there. That’s it. It looks easy, but you may feel it in your thighs after a few breaths.
How to do it:
- Stand with your feet together or hip-width apart.
- Breathe in and raise your arms up by your ears.
- Breathe out, bend your knees, and push your hips back.
- Keep more weight in your heels and you should be able to lift your toes.
- Lift your chest so you’re not bending forward too much.
- Hold for 3 to 5 breaths, then breathe in and stand back up.
Benefits:
- Builds strength in the thighs, hips and glutes
- Works the muscles around your knees and ankles
- Warms you up fast
Beginner tip: Look down, can you still see your toes? Good. If your knees are way out in front, sit back more. Arms feeling heavy? Put your hands on your hips.
Read More: Utkatasana (Chair Pose): Benefits, Steps & Common Mistakes Beginners Must Avoid
7. Tree Pose (Vrikshasana)
This is the balance pose most people picture when they think of yoga. You stand on one leg like a tree with its roots in the ground.
How to do it:
- Start in Mountain Pose and move your weight into your left foot.
- Lift your right foot and place the sole on your left ankle, calf, or inner thigh.
- Not on the knee, though. Go above it or below it.
- Bring your palms together at your chest.
- Pick one spot in front of you that doesn’t move, and look at it.
- Stay for 3 to 5 breaths, or longer if you feel steady. Then switch legs.
Benefits:
- Trains your balance
- Strengthens the ankle, calf, and thigh you’re standing on
- Helps you focus
- Opens the hip of the bent leg
Beginner tip: You may shake a little, everyone does. This is normal as your body learns to balance. Start with your foot at the ankle and your toes on the floor. A wall nearby can help.
Read More: Vrikshasana (Tree Pose): How To Do It, Benefits And Precautions
8. Warrior II (Virabhadrasana II)
This pose is named after Virabhadra, a fierce warrior from Hindu stories. It’s strong and wide, and you’ll feel it in your front thigh.
How to do it:
- Stand with your feet wide apart, about 3 to 4 feet away from each other.
- Turn your right toes toward the right side of the mat and your left toes slightly toward the front, about 10–15°, keeping your left heel on the floor
- Bend your right knee until it is over your right ankle, keeping the knee in the same direction as your toes
- Keep your left leg straight and press your left foot firmly into the floor
- Raise both arms to shoulder height, reaching your right arm forward and your left arm back
- Keep your back straight, turn your head toward your right hand and look over your right fingertips
- Hold for 5–8 slow breaths, then straighten your right leg and lower your arms before repeating on the other side.
Benefits:
- Makes your legs and hips stronger
- Stretches the inner thighs
- Builds stamina, since you’re holding a strong shape
- Works your arms and shoulders too
Beginner tip: Keep your bent knee pointing in the same direction as your toes. Do not let it move toward your other leg. If your legs start to hurt, bend your knee a little less.
Read More: Virabhadrasana: Alignment, Benefits, and Variations
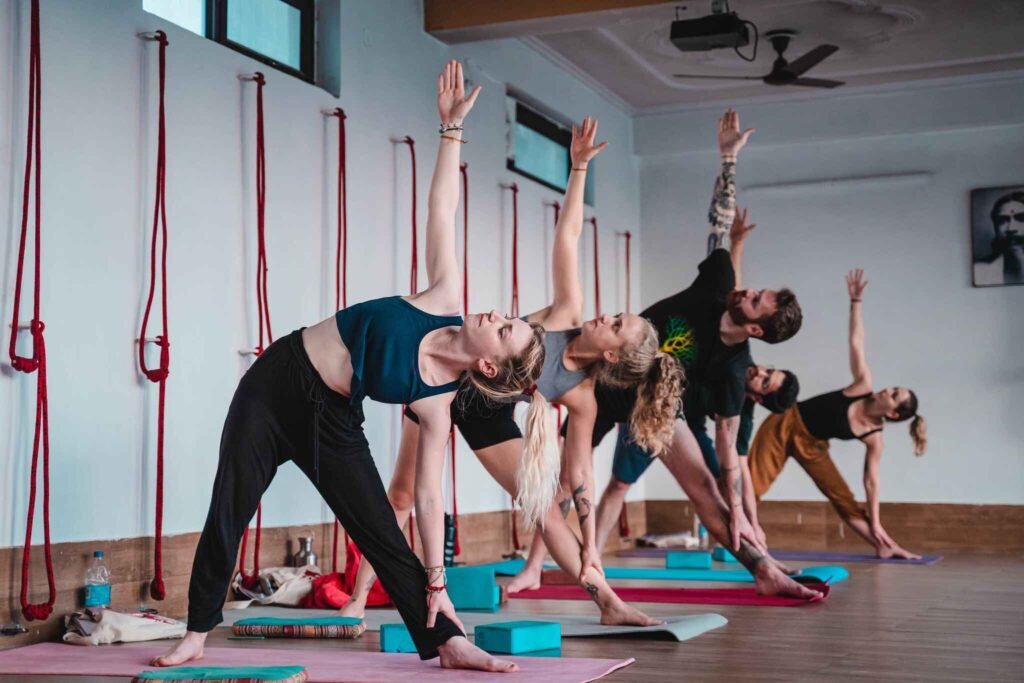
9. Extended Triangle Pose (Utthita Trikonasana)
Same wide position as Warrior II, but both legs stay straight. From the side, your body makes a few triangle shapes.
How to do it:
- Set up your feet like Warrior II, right foot turned out.
- Keep both legs straight.
- Lift both arms straight out, one to the left and one to the right, at shoulder height.
- Then lower your right hand to your lower leg, ankle, or a block.
- Lift your left arm toward the ceiling.
- Look forward and if your neck feels fine, you can look up at your top hand.
- Hold for 3 to 5 breaths and breathe in to come up, then do the other side.
Benefits:
- Stretches the backs of the legs, the hips, and the sides of the body
- Keeps the legs working the whole time
- Opens the chest
Beginner tip: Do not try to reach the floor and if the floor feels too far away, place your hand on your lower leg. This is better than forcing your body down.
10. Extended Side Angle Pose (Utthita Parsvakonasana)
This one mixes Warrior II legs with a long side stretch. The version here is the easy one, and it’s where most people start.
How to do it:
- Come into Warrior II with your right knee bent.
- Breathe out and lean your body over to the right.
- Rest your right forearm on your right thigh.
- Reach your left arm up, or stretch it over your ear.
- Turn your chest toward the side wall instead of the floor.
- Keep your back foot firmly on the floor.
- Hold for 3 to 5 breaths. Breathe in to come up. Switch sides.
Benefits:
- Helps keep your legs, knees, and ankles strong
- Stretches your whole side, from back foot to fingertips
- Opens the hips and inner thighs
Beginner tip: Rest your arm lightly on your thigh and don’t sink your full weight into it. Your legs should still be doing most of the work.
Poses to Leave for Later
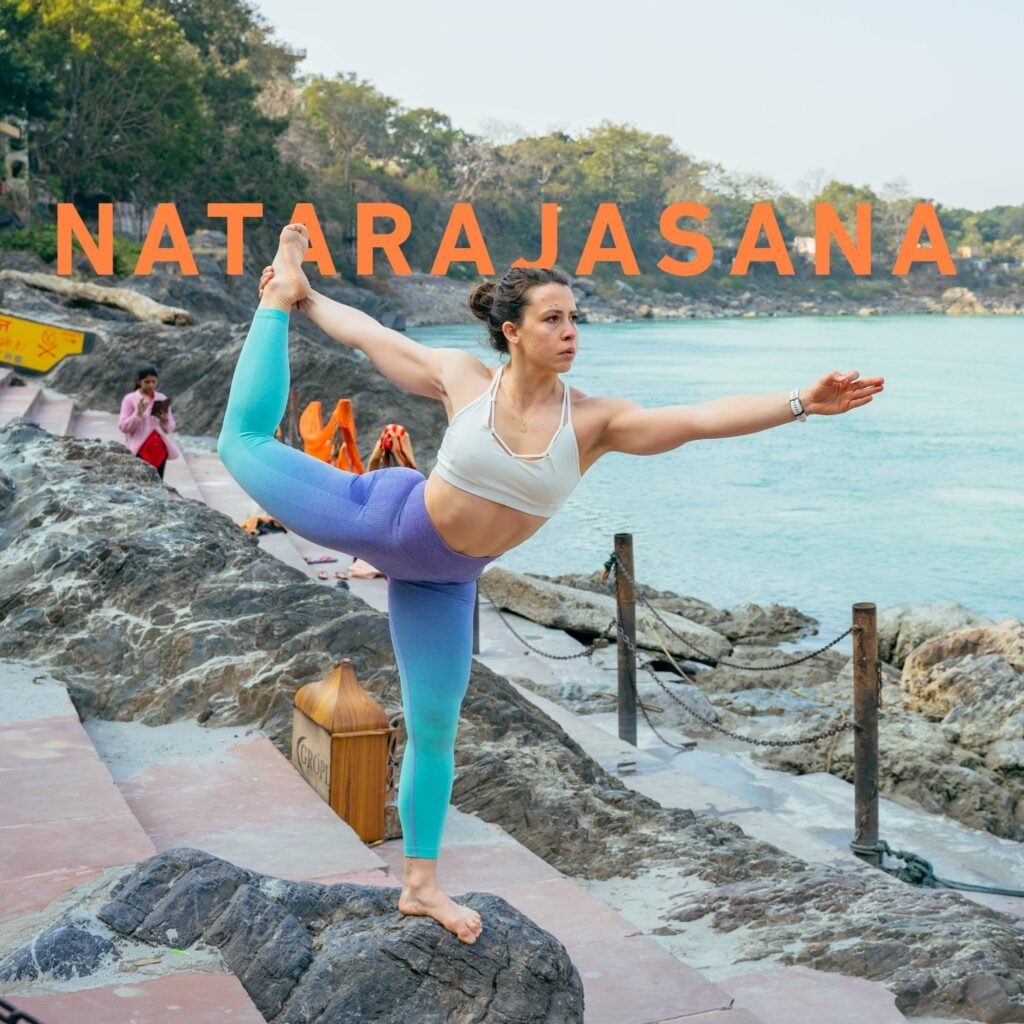
You might see Dancer’s Pose (Natarajasana) or Eagle Pose (Garudasana) on other beginner lists. They’re great poses. But they ask for a lot of balance and flexibility, and they’re easy to get wrong at first.
Spend a few weeks with the 10 poses above. Once you feel steady, try the harder ones, ideally with a teacher watching.
A Simple 15-Minute Routine
Want to put it all together? Try this:
- Mountain Pose, 1 minute of quiet breathing
- Upward Salute, 3 times, moving with your breath
- Standing Side Bend, 3 breaths each side
- Standing Half Backbend, 2 breaths
- Standing Forward Bend, 5 breaths
- Chair Pose, 3 to 5 breaths, done twice
- Tree Pose, 5 breaths each side
- Warrior II, 5 breaths each side
- Triangle Pose, 5 breaths each side
- Extended Side Angle Pose, 5 breaths each side
- Back to Mountain Pose, or lie down and rest for a few minutes
Three or four times a week is plenty to begin with. Short and regular works better than long and rare.
Which Standing Pose Helps Most With Balance?
For most beginners, it’s Tree Pose (Vrikshasana). Standing on one leg makes your feet, ankles, and core work together to keep you up. Keep your foot low and keep a hand on the wall.
Mountain Pose helps too, in a quieter way. It teaches you to spread your weight evenly, which every balance pose needs.
Can Standing Yoga Improve Your Posture?
It can help, yes. Mountain Pose shows you what upright standing feels like. Chair Pose and Warrior II strengthen the legs and hips that hold you up all day. And poses like Upward Salute and the Standing Half Backbend open up a chest that’s used to rounding forward.
It won’t happen overnight. Often the biggest change is that you simply start noticing how you’re standing, and you fix it.
Final Thoughts
Standing yoga poses for beginners are simple, safe, and useful. They build strength in your legs, steady your balance, and help you pay attention to how you stand and move. You really don’t need to be flexible or fit to start.
Pick a few poses. Breathe slowly. Use the wall when you need to. Do a little, a few times a week, and let your body get there in its own time.
If you’d like help with alignment and breathing, you’re welcome to join a yoga teacher training in India at Samadhi Yoga Ashram.
Frequently Asked Questions
Can I do standing yoga poses at home?
Yes. Every pose in this guide works at home. Use a mat that doesn’t slip, clear a bit of space, and keep a wall or sturdy chair close by. If you can, take a few classes with a teacher so someone can check your alignment.
Is it OK to do them every day?
Gentle standing poses are fine to do daily. If your legs are sore, take a day off or keep the session short and easy.
Should standing poses come before or after seated ones?
Usually before. Standing poses warm you up. Seated stretches and rest tend to come later in a session.
Why do my legs shake?
Your muscles are working hard and it’s very common early on and usually fades as you get stronger. If it gets a lot, bend a bit less, hold for fewer breaths, or come out and rest.
Do I need yoga blocks?
Not really, but they’re handy. They bring the floor closer in poses like Forward Bend and Triangle.
Can older adults do standing yoga?
Many do, especially with a wall or chair for support. Tree Pose can be done with the toes on the floor. Chair Pose can be done with just a small bend. If you have balance problems or have fallen before, talk to your doctor first.
When’s the best time to practise?
Mornings can help you feel more awake. Evenings can ease stiffness from sitting all day. Honestly, the best time is whenever you’ll actually do it. Just not on a full stomach.
This article is for general information and is not medical advice. If you have a respiratory or heart condition, are pregnant, or are unsure whether these practices suit you, please speak to your doctor before beginning. Yoga poses and breathing exercises should be practiced with proper guidance from a qualified yoga teacher to help ensure safe and correct practice.