





Plank Pose (Phalakasana): Steps, Benefits, and Common Mistakes
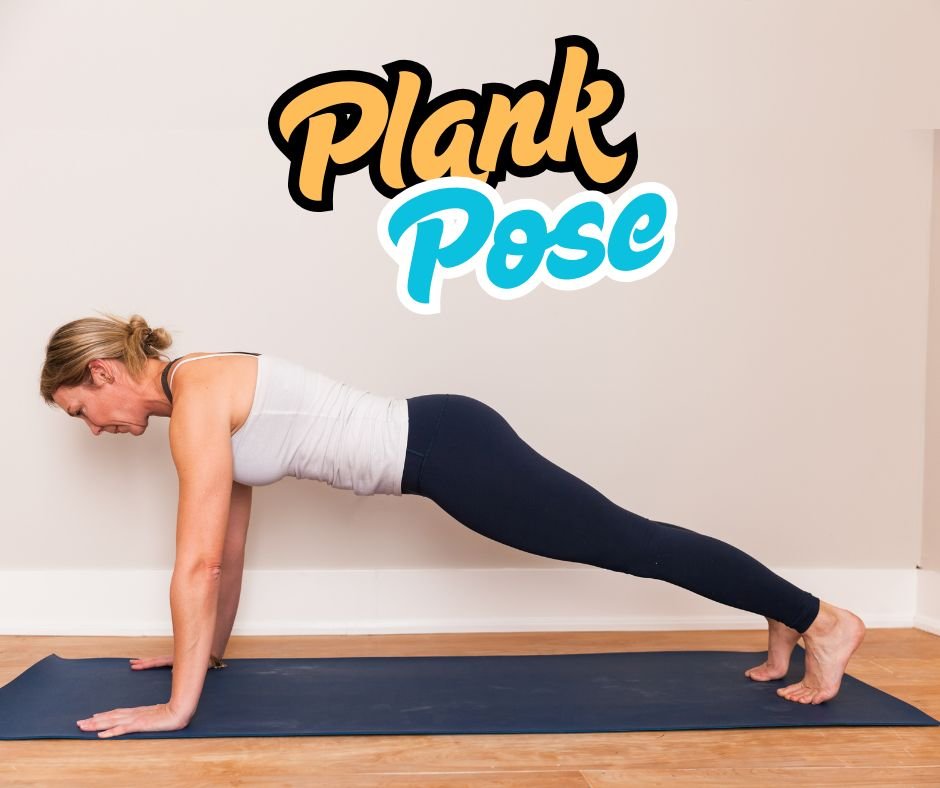
Table of Contents
- What Is Plank Pose (Phalakasana)?
- Why This Pose Shows Up So Often in Yoga
- How to Do Plank Pose, Step by Step
- So How Long Should You Actually Hold It?
- Which Muscles Are Actually Working in Plank Pose?
- Plank Pose Benefits
- Is Plank Pose Actually Good for Beginners?
- Making Plank Easier When You’re Just Starting Out
- Common Mistakes Beginners Make in Plank Pose
- A Few Plank Pose Variations Worth Knowing
- Plank Pose vs Forearm Plank, What’s the Real Difference?
- Staying Safe in Plank Pose
- Other Core Strengthening Poses Worth Pairing With Plank
- Final Thought
- Frequently Asked Questions
- What is Plank Pose or Phalakasana?
- How do you do Plank Pose?
- What are the benefits of Plank Pose?
- What muscles does Plank Pose work?
- How long should you hold Plank Pose?
- Is Plank Pose good for beginners?
- How can beginners make Plank Pose easier?
- What are common Plank Pose mistakes?
- What is the difference between Plank Pose and Forearm Plank?
Plank Pose is one of those postures that looks easy until you actually try holding it for thirty seconds. Scroll through any yoga class and you’ll see it everywhere, included between sun salutations, used as a core exercise, taught on day one to complete beginners. There’s a reason for that. Few poses teach you as much about strength, breath, and body control in such a short amount of time.
This guide walks through everything a beginner really needs to know about Plank Pose, written the way a teacher might explain it to you in person, not the way a textbook would.
What Is Plank Pose (Phalakasana)?
The word “Phalakasana” comes from two simple words. In Sanskrit, “phalaka” means plank or board, and “asana” means pose. So “Phalakasana” simply means “plank pose,” which is a perfect description of what it looks like.
You may also hear it called “high plank,” which is different from “forearm plank,” where you rest on your elbows instead of your palms.
Plank Pose is usually placed between other poses in a yoga sequence, but it is powerful enough to practice on its own too. You do not need any equipment, any experience, or any special flexibility to begin. You only need a flat surface and a few minutes.
Why This Pose Shows Up So Often in Yoga
Plank rarely gets treated as a main pose. Most of the time, it’s a bridge, something you pass through on the way to Chaturanga (low plank), Downward Dog, or an arm balance further down the sequence. But plenty of teachers also have students hold it on purpose, purely to build strength.
What makes it useful is how many muscles work at the same time. You’re not just working your abs here. Your shoulders, back, legs, and even your hands are doing something. That’s part of why it is called a full-body pose rather than just a core exercise.
How to Do Plank Pose, Step by Step
Here’s the pose explained in simple steps. Take your time with each step and don’t rush into the pose.
- Lie down on your stomach on the mat
- Place your hands beside your shoulders with your palms flat on the floor
- Bend your toes so they touch the mat, ready to push up
- Press your hands into the mat and use them to lift your body up, until your arms are fully straight
- Straighten your legs too and lift your stomach, hips and knees off the mat
- Your body should now be resting only on your hands and feet
- Make sure your body forms one straight line from your head to your feet
- Do not let your hips drop down or let them go too high either
- Keep your shoulders right above your hands
- Pull your stomach in gently and keep it firm
- Keep your neck relaxed and look down at the mat or slightly ahead
- Breathe slowly and normally, try not to hold your breath
- Stay in this position for a few calm breaths
- Slowly lower your knees down to the mat and rest
So How Long Should You Actually Hold It?
Start with 10-20 seconds, that is enough when you are just beginning. Nobody expects a beginner to hold a minute-long plank on day one, and honestly, trying to do that too early usually just makes your form worse.
As your strength builds, try holding the pose for 30 seconds or a little longer. Do not worry about holding it for a long time. A short plank done properly is more useful than a long one with your hips dropping or your shoulders losing support. If you notice your body losing its position, come down, take a short rest and try again.
Which Muscles Are Actually Working in Plank Pose?
People assume plank is purely an ab exercise. It isn’t, not even close.
Your core does hold things together, yes, keeping the spine stable and stopping the hips from dropping or rising too much, but your shoulders and arms are carrying real weight too, supporting a large part of your body throughout the hold. Your chest muscles help along with the arms to keep the upper body from shaking.
Then there’s your back. Muscles running along the spine keep everything from rounding forward or arching. Your wrists and hands take on pressure as they press into the mat, which explains why hand placement matters more than people realize and down below, your glutes, thighs, and calves work together to keep your body straight and steady.
Because so much is happening simultaneously, plank often gets used as a quick test of whole-body strength rather than just stomach strength.
Plank Pose Benefits
- Builds real core strength, since your abdominal muscles are actively supporting your spine throughout the entire hold.
- Strengthens shoulders, arms, and wrists through steady effort while supporting your body weight.
- Builds muscle stamina. Holding a still position over time trains muscles differently than quick, repetitive movements do.
- Sharpens body awareness. You start noticing small changes in alignment that you’d otherwise never pay attention to.
- Supports balance and stability, benefits that tend to carry over into other poses and everyday movement.
- Works the legs and glutes as much as the upper body, even though people rarely expect that.
- Functions as a compact, full-body conditioning exercise, hitting several muscle groups in one simple position.
None of this happens overnight, worth saying clearly. These benefits build gradually, and they depend more on doing the pose regularly and correctly than on holding it for a very long time.
Is Plank Pose Actually Good for Beginners?
Yes, genuinely. It’s classified as a beginner-level pose for good reason. You don’t need unusual flexibility, and you can make it easier or harder based on your strength level.
That said, new practitioners should aim for good form over a short time rather than forcing themselves into a long, shaky hold. Quality wins over duration here, especially early on.
Making Plank Easier When You’re Just Starting Out
If the full pose feels like too much right now, there’s nothing wrong with modifying it. A few options:
- Drop your knees down, keeping your hands under your shoulders but letting your knees rest on the mat instead of balancing on your toes. This makes the pose shorter and takes pressure off your arms and core.
- Hold for less time; even five or ten seconds with good form is enough when you are just starting out.
- Try it on a wall, standing facing it with your hands pressed against the wall and leaning in at an angle. This is a gentle way to learn the position before trying it on the floor.
- Take breaks by doing two or three short holds with some rest in between instead of one long hold.
There’s genuinely no rush toward some advanced, extended plank. Strength shows up with repeated, steady practice, not through forcing it in week one.
Common Mistakes Beginners Make in Plank Pose
- Letting the hips sag down puts extra strain on the lower back. Lift the hips up gently so the body forms a straight line again.
- Lifting the hips too high makes the pose look like Downward Dog and takes the work away from the core. Bring the hips back down until the body is level.
- Placing the hands too far in front adds extra strain to the shoulders and wrists. Keep the hands right under the shoulders instead.
- Holding the breath without noticing is something almost every beginner does. Keep breathing slowly and steadily the whole time.
- Letting the head hang down can strain the neck over time. Keep the neck long and look gently forward or down at the mat.
- Locking the knees too tightly only creates tension instead of building strength. A small amount of natural effort in the legs is enough.
Small adjustments here matter more than people expect. Fixing even one or two of these can change how the entire pose feels.
A Few Plank Pose Variations Worth Knowing
Once the basic shape feels stable, a handful of variations can add either variety or challenge.
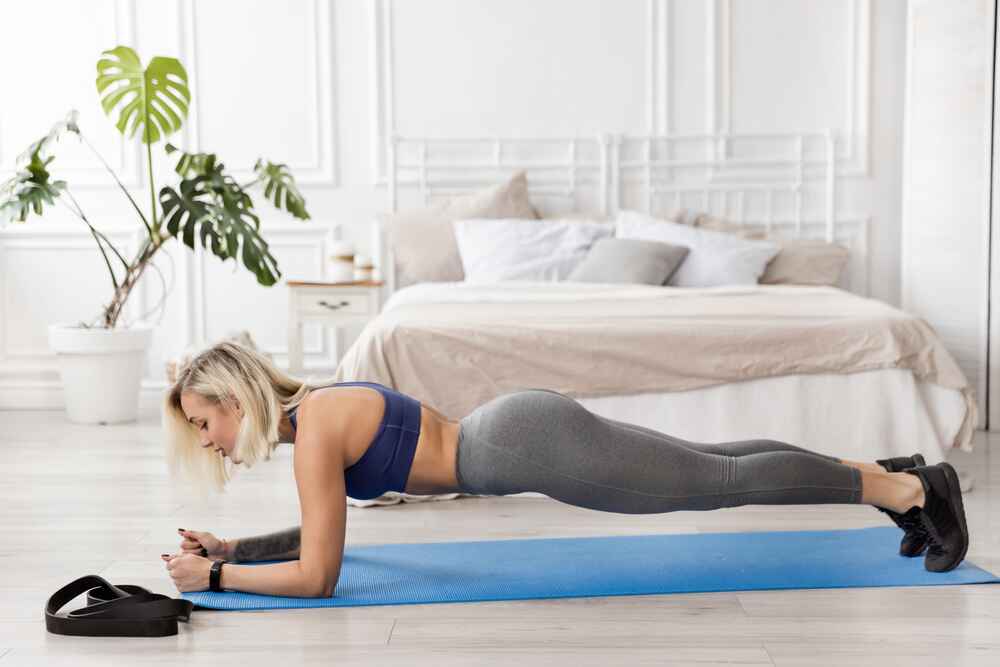
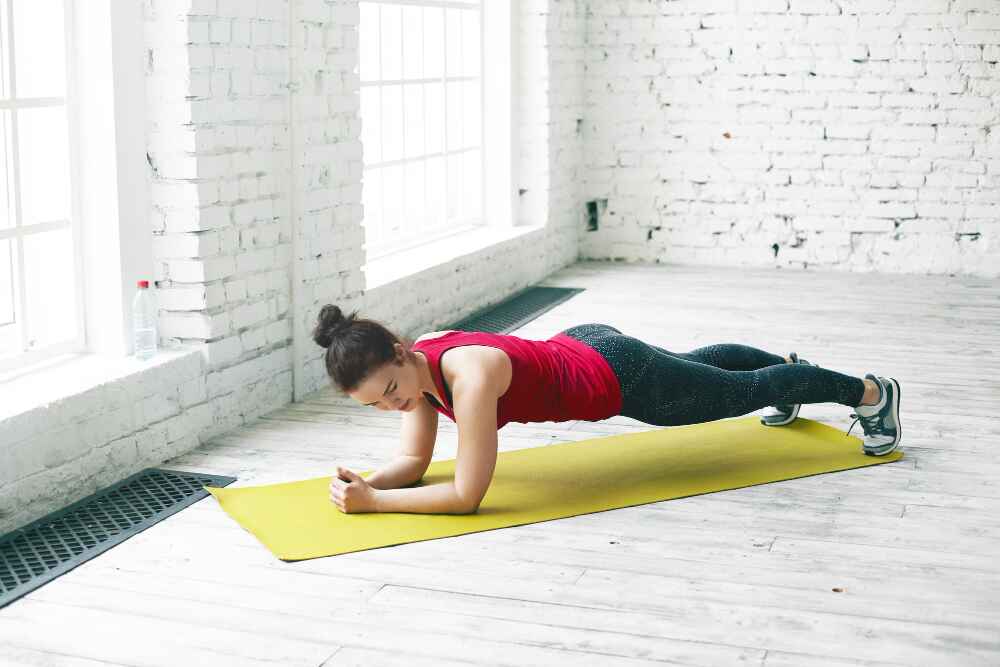
- Forearm Plank: Instead of resting on your palms, you’re supported on your forearms, with your elbows directly under your shoulders. This takes pressure off the wrists while asking more from your shoulders and core.
- Knee Plank: The easier version mentioned earlier, useful for beginners or anyone easing back to yoga after a break.
- Side Plank: Turn to one side and support your body with one hand and the side of one foot. It helps improve balance and works the side muscles of your stomach more than a regular plank.
- Plank with Shoulder Taps: From a regular plank, you tap the opposite shoulder with one hand at a time. Small movement, but it adds a real balance challenge.
You don’t need to chase every variation right away. Plenty of practitioners stick with the basic version for months and get real value out of it.
Plank Pose vs Forearm Plank, What’s the Real Difference?
The real difference is where your weight rests. In plank pose, your arms stay straight and your weight goes through your palms. In the forearm plank, your arms are bent, and your weight goes through your forearms instead.
Forearm plank often feels kinder on the wrists since there is no pressure on the palms. It does ask a little more from your shoulders and upper back though.
Some people find one version more comfortable than the other. There is no rule saying you must pick just one, you can practice both.
Staying Safe in Plank Pose
For most healthy beginners, plank pose is a low-risk pose. Still, a few things are worth keeping in mind.
- Sharp pain in your wrists, shoulders, elbows, or lower back is a signal to come out of the pose immediately. Mild effort and shaking muscles are normal. Sharp, unusual pain is not something to push through.
- If your wrists are bothering you, switch to forearm plank, or simply shorten how long you hold the palm version.
- Feeling strain in your lower back usually points to sagging hips. Check your alignment, and consider the knee version until your core feels a bit stronger.
- If you’re pregnant, recovering from an injury, or managing any ongoing health condition, it’s worth talking to a doctor or a qualified yoga teacher before practicing Plank Pose regularly, so it can be adjusted properly for your situation.
Listening to your body matters more than pushing through discomfort ever will. A short, well-aligned plank beats a long one done with poor form, every time.
Other Core Strengthening Poses Worth Pairing With Plank
Plank rarely works alone in a practice. It pairs naturally with poses like Boat Pose, Side Plank, and Forearm Plank. Practising these together, with real attention to alignment, tends to build a more well-rounded foundation of core strength than repeating plank by itself.
Final Thought
Plank Pose looks simple at first, just a straight line held in place. But underneath that simplicity is a real lesson in staying steady, breathing through effort, and holding good form when your body wants to quit. Whether you’re new to yoga or just trying to strengthen your foundation, giving this pose real attention pays off over time.
If you’d like to go deeper into poses like this one, including alignment, breathing, and how to actually teach them to others, Samadhi Yoga Ashram runs yoga teacher training in India programs built for students who want a stronger, more complete foundation in their practice.
Read More: Vrikshasana (Tree Pose): How To Do It, Benefits And Precautions
Frequently Asked Questions
What is Plank Pose or Phalakasana?
It’s a yoga posture where your body stays straight and steady, supported by your hands and feet, roughly resembling the top position of a push-up.
How do you do Plank Pose?
Start on your hands and knees, place your hands under your shoulders, step your feet back one at a time, then hold your body in a straight line while keeping your core gently engaged and your breath steady.
What are the benefits of Plank Pose?
With regular practice, it can help build core strength, support shoulder and arm strength, improve muscular endurance, and sharpen balance and body awareness.
What muscles does Plank Pose work?
Core, shoulders, arms, chest, back, wrists, glutes, and legs all get involved, which is why it reads more as a full-body pose than a simple ab move.
How long should you hold Plank Pose?
Beginners generally start around 10 to 20 seconds, prioritizing form, and can build gradually toward 30 seconds or more.
Is Plank Pose good for beginners?
Yes. It’s considered beginner-friendly and adjusts easily through variations like the knee version for those just starting out.
How can beginners make Plank Pose easier?
Try dropping the knees to the mat, shortening the hold time, or practicing a wall version first to build strength before attempting the full floor pose.
What are common Plank Pose mistakes?
Sagging hips, hips lifted too high, hands placed too far forward, holding the breath, and letting the head drop are the most frequent ones.
What is the difference between Plank Pose and Forearm Plank?
Standard Plank rests on straight arms and palms, while Forearm Plank shifts that support onto bent forearms, which usually feels gentler on the wrists.
This article is for general information and is not medical advice. If you have a respiratory or heart condition, are pregnant, or are unsure whether these practices suit you, please speak to your doctor before beginning. Yoga poses and breathing exercises should be practiced with proper guidance from a qualified yoga teacher to help ensure safe and correct practice.